Welp, the holidays are over, the kid's back at school and I'm back to work. But before I really give myself over to 2014, I wanted to recap the stuff I made this year.
I used to dread these recap posts, worried that it would highlight how little I actually accomplished, but then I'd see the mosaic of makes and realize that I actually DID make some stuff. So this year, I skipped the dread and went directly to looking forward to creating my Mosaic of Makes!
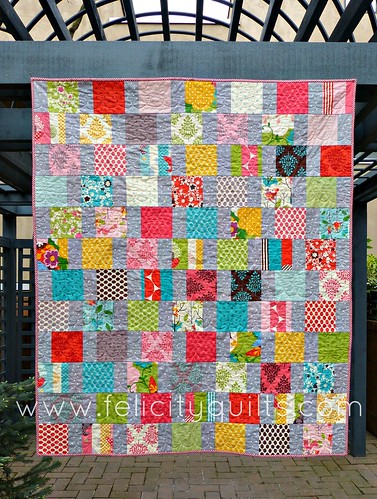
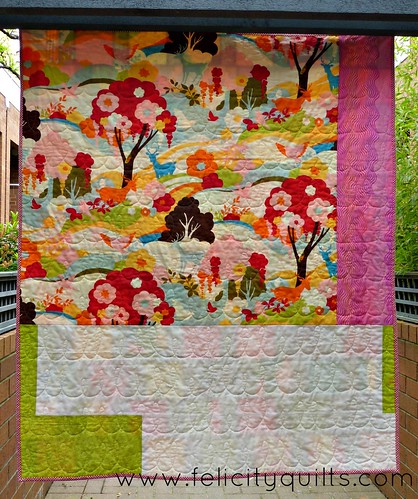
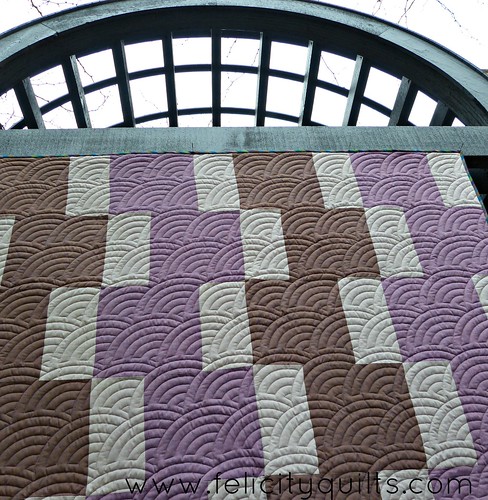
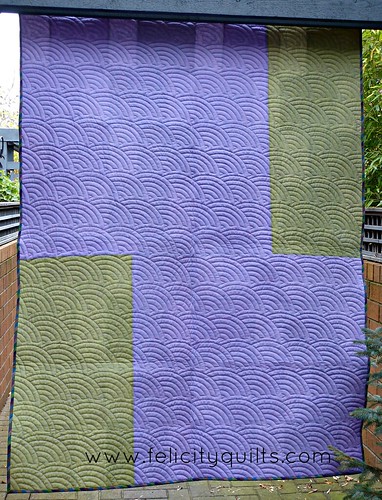
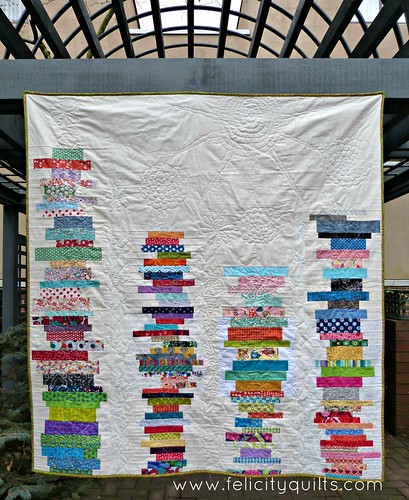
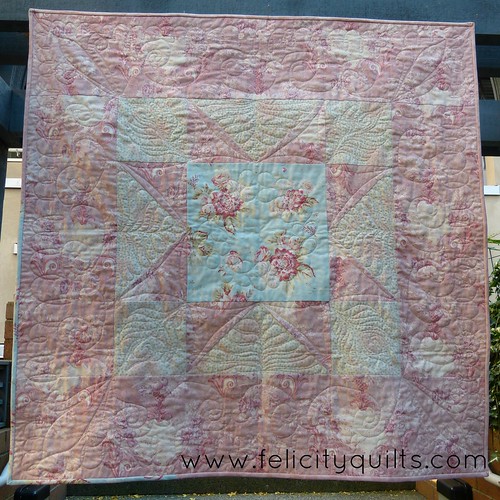
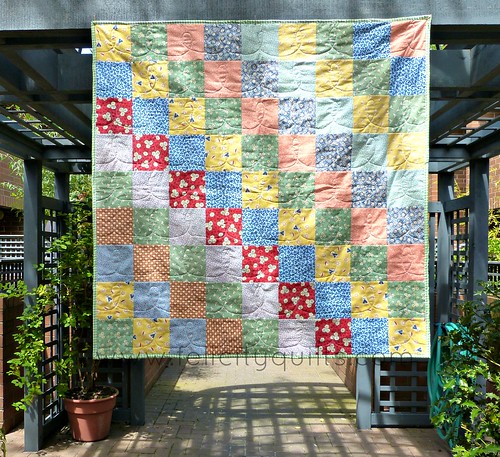
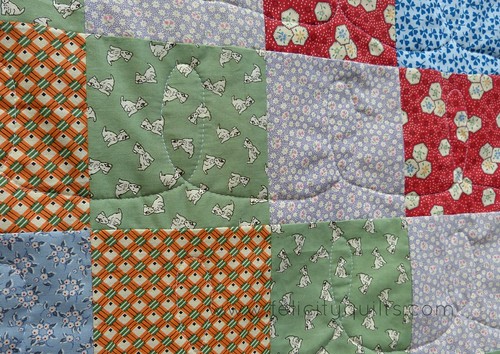
I made 10 quilts (but could only fit 9 in my mosaic):
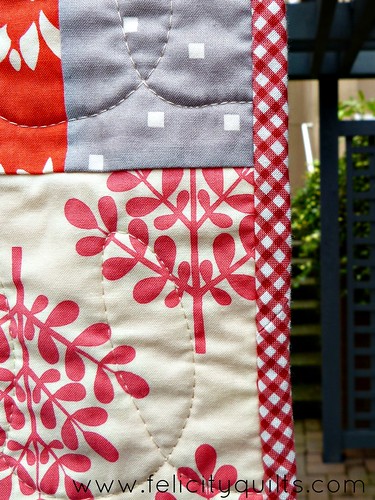
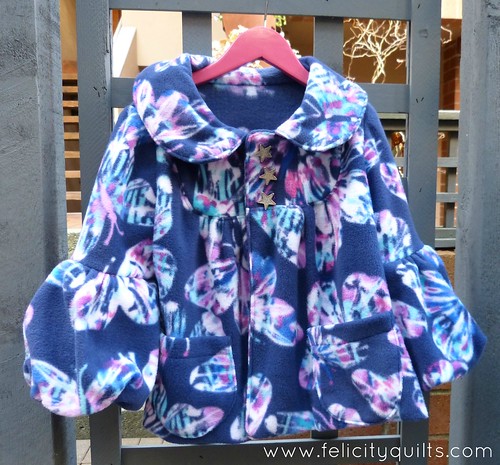
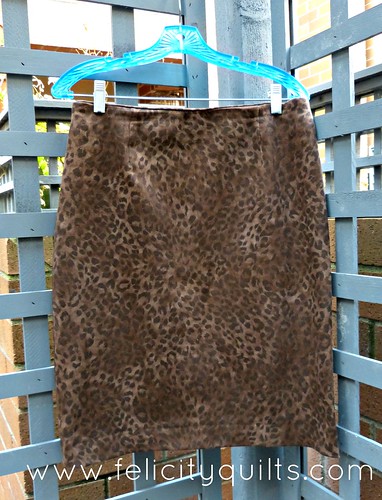
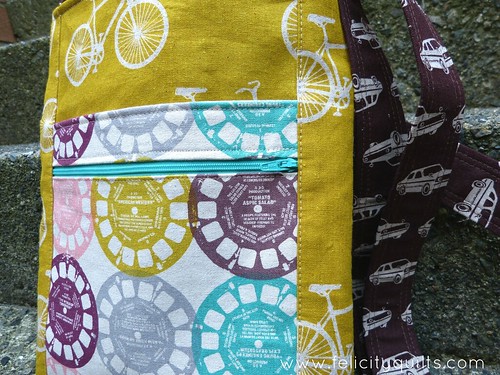
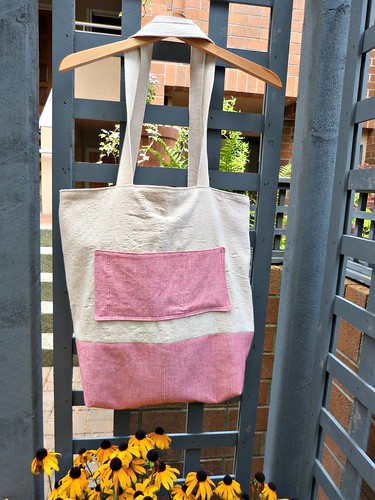
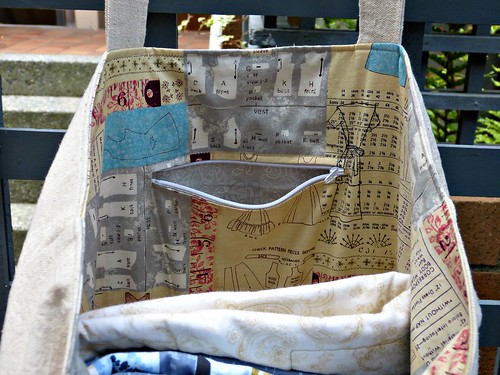
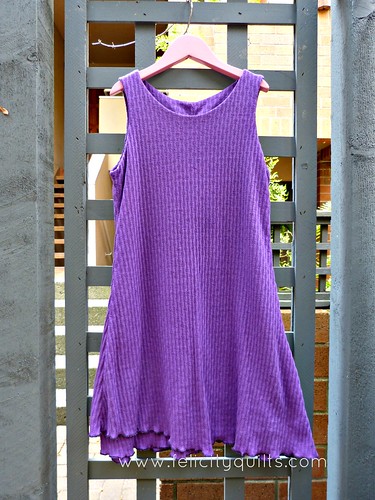
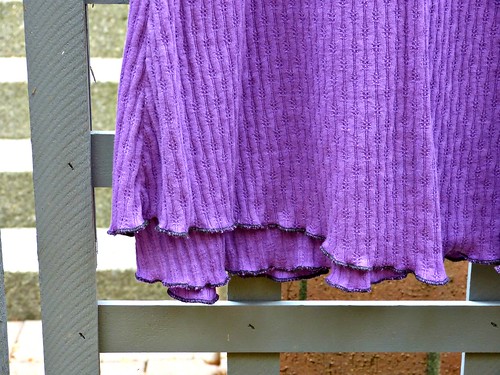
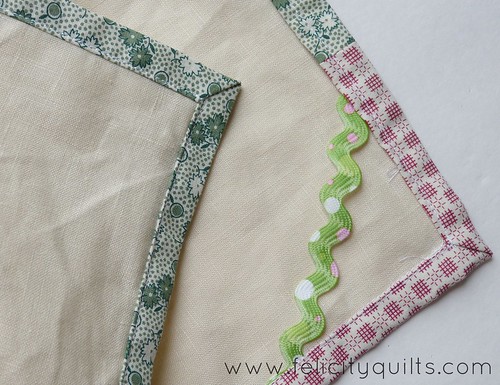
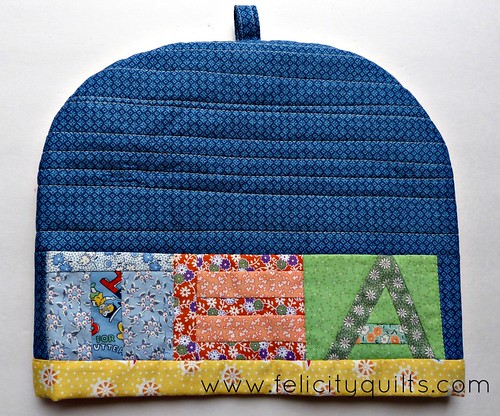
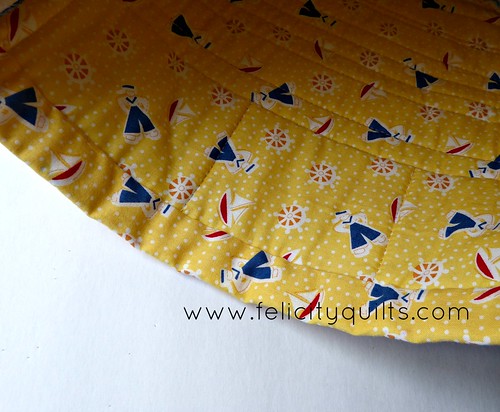
And a bunch of other stuff, a sampling of which is pictured here:
That bottom-right mug rug is one of 10 I made for my colleagues, and blogged here. I'm particularly proud of those finishes.
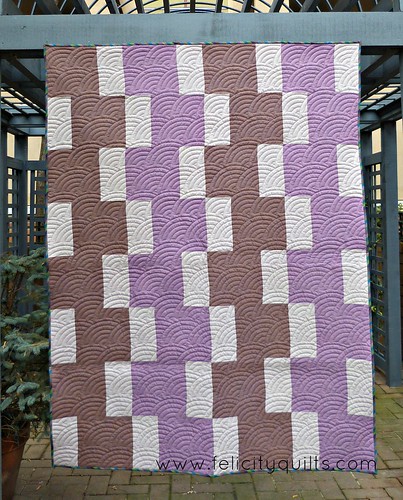
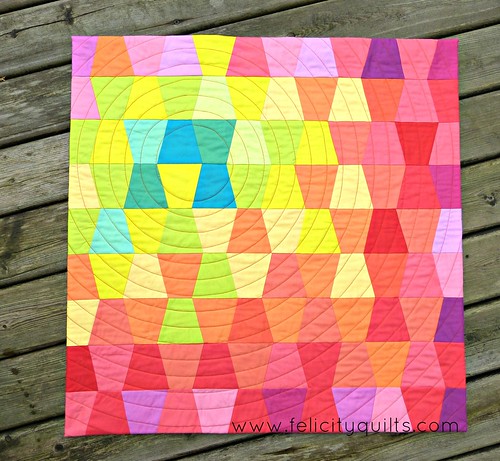
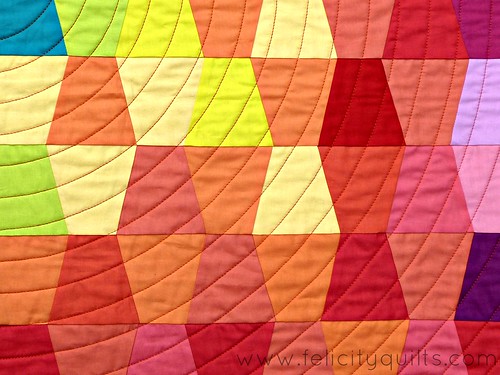
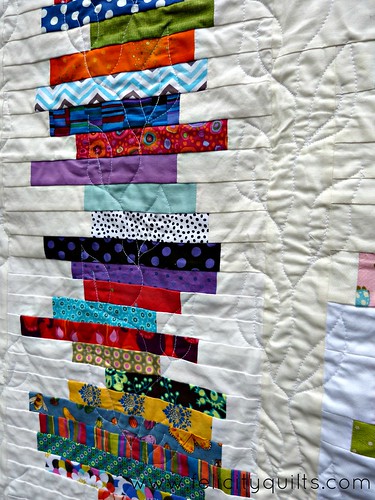
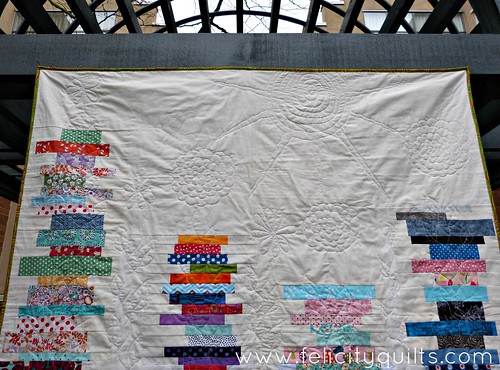
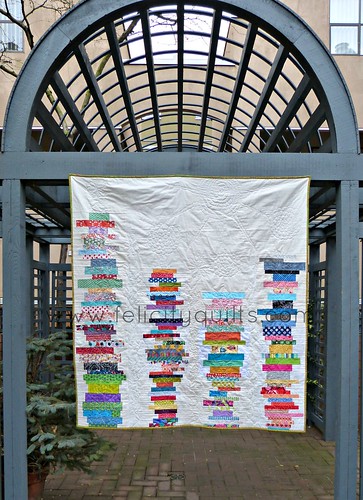
Another finish I'm particularly pleased with is the New Wave quilt I made for my niece - that was a long-standing WIP. I never stopped liking the project; I just ran out of steam. So glad I picked it up again.
I'm going to milk these recap/goal-setting posts for all they're worth so stay tuned for a separate Goals of 2014 post!
Showing posts with label 2013 finishes. Show all posts
Tuesday, January 7, 2014
Thursday, January 2, 2014
The Quilt I Totally Forgot to Blog About
What can I say? Life got a bit busy for me this year, and I wasn't able to keep up with this blog the way I have in the past. I completely forgot to blog about my It's a Hoot, Baby quilt!
This quilt was made together with my work colleagues for our manager who had a baby girl earlier last year. I started with two charm packs of It's a Hoot by Momo (Moda), added in some strips of grey Sherbet Pips, adapted my Easy Going Modern pattern (I'm totally a one-hit wonder, folks!) and we went to town. I brought in my sewing machine one day and set it up in our meeting room, and gave everyone the rundown of what they'd be doing.
First up, fabric selection.
Then came piecing. Most of my colleagues had never used a sewing machine before, but they did so well!
They arranged their blocks on the design wall.
Then I took everything home and put on a few finishing touches.
Quilting was two sizes of loopy loops - it's quickly become one of my favourite go-to motifs for a quick finish - and bound with a nice check cut on the bias.
The back was built around a large piece of the deer print (LOVE), and used up a bunch of my scraps/stash fabrics. It's hard to tell in the photo, but we all signed a strip of Kona Snow and I pieced it into the back.
Our manager loved it, as did her sweet girl. This was a 2013 FAL finish which I have already linked. Are you going to join in for 2014? Do it! It's fun! I finished a few long-standing WIPs this year because of it.
Thursday, December 19, 2013
Modern Purples
Hooray! Another Q4 FAL finish to cross off the list! Modern Purples is a version of my Easy Going Modern pattern. This time I stitched it up using some beautiful Kaffe Fassett shot cottons. The hand is lighter than quilting cotton, but they are so, so soft. Dreamy!
The quilt's colour choices were inspired entirely by this fabulous stripe. As soon as I saw it, I knew it needed to be the binding.
Krista Withers did a wonderful job on the quilting, didn't she? The batting is a lofty polyester, so it's soft and poofy but really warm.
The quilt's colour choices were inspired entirely by this fabulous stripe. As soon as I saw it, I knew it needed to be the binding.
Krista Withers did a wonderful job on the quilting, didn't she? The batting is a lofty polyester, so it's soft and poofy but really warm.
The back also picks up colours from the binding (the quilt isn't as wonky as it looks in the photo. Yikes!).
This quilt is a gift for a very special person celebrating a milestone birthday in the next few weeks. I think it's going to be well-received.
Labels:
2013 finishes,
easy going modern,
Finish A Long,
quilt
Monday, December 2, 2013
File Under: Other Sewing
I've been sewing some non-quilty things lately - "other sewing" as I tend to call it in my head.
First is this fleece jacket for G made using McCalls 5743. Do I even need to mention that the fabric was her choice?
The buttons were, too.
I had to use the walking foot to deal with all those layers of fleece, and marking the pieces was a little challenging but other than that, the pattern came together pretty well.
Next up, is a pencil skirt I made because I couldn't find what I was looking for in the stores. This also came together quickly, even with the zipper (glue baste for the win!). The fabric is a stretch cotton, and it's quite comfy.
McCalls 3830
Both of these finishes were on my 2013 4th Quarter list of Finish Along projects and I have to say, extrinsic motivation really works for me!
Monday, November 25, 2013
Two Zip Hipster
I started this Two Zip Hipster while on retreat at Loon Lake, and was able to finally finish it today (hooray for flex days!)
Erin Erickson of Dog Under My Desk's pattern is extremely well-written with tons and tons of nice clear photos for visual makers like me. I followed her instructions exactly as written with the exception of using three different fabrics for the bag's exterior.
The cars and bikes are Echino, and the viewmasters are an older Melody Miller design for Kokka. All of the exterior fabrics are heavier cotton-linen blends and were marvelous to work with. The interior is Alexander Henry's Heath in a nice muted grey:
It's very cute and a really nice size that's perfect for a wallet, phone, keys and maybe a notebook.
New techniques I learned: using slider hardware to make an adustable strap and inserting a recessed zipper.
Things I'll do differently next time I make this pattern: reverse the placement of the strap so that the slider lands on my back and not my front when it's slung on my right hip; use the same fabric for the front and back or at least choose ones that don't contrast so much; install an interior zip pocket.
Overall, though, I'm really happy I made this bag, and I feel like I built some skills doing it. I also tested the limits of my sewing machine: top-stitching through multiple layers of bag fabric, plus interfacing, plus many layers of strap was slightly too much for ol' Jojo. But only slightly. All I had to do was go back to a single straight stitch from the triple stitch I'd been using and it was smooth sailing.
Tuesday, November 19, 2013
Needle Book and a Burst of Colour
Vancouver Modern Quilt Guild had a needle book swap with the London (UK) Modern Quilt Guild and it was loads of fun!
This little goodie was what I made using Kerry Very Berry Handmade's tutorial:
It's a combo of Yarn Dyed in Black and some lovely Michael Miller Cotton Couture solids. I used those particular solids because it was my insurance plan in case I didn't get my VMQG Cotton Couture Challenge project completed on time. The needle book could do double duty if necessary.
But it wasn't necessary! I managed to complete my challenge project on time and I'm so very happy with it. Introducing Burst of Colour:
I love it. LOVE it! I was obviously very inspired by the colour placement that Krista Poppyprint used in her Full Circle quilt. And Berene made the brilliant suggestion to borrow Krista's Go!Baby cutter to make tumbler shapes. They give this quilt so much movement, and were a snap to piece together.
I used dark orange thread to quilt concentric circles (again with the Full Circle inspiration) and used a facing instead of a binding per Terry's tutorial. The quilt is 26" square.
While I didn't win Viewer's Choice at our meeting, I am really happy to have made this project and it will hang in my home where I'll see it every day.
Tuesday, November 12, 2013
Reading in my Garden: a 2013 Q4 Finish
I spent this past weekend at Loon Lake camp on the annual retreat Krista organizes each November. It was a fantastic time, as usual, except for the fact that I was hit by a really bad cold the night I arrived. That seriously cut into my quilting/partying/time, let me tell you. Still, I had lots of fun with quilting friends from near and afar.
Also as usual with these retreats, I overestimated how much I would get done (even assuming no illness), but at least I had lots of bits to choose from. This quilt was one of the first projects I tackled, and I'm so very pleased to have it done!
This WIP dates back to 2012! I won the blocks in a block lotto at VMQG, and pieced the top shortly thereafter. One seam was a bit foofy and I planned to unpick it but that's where progress halted. Then I came to my senses, and put the project on my 2013 Finish Along list for Q4.
I quilted it with a leafy, viny motif...
and added some flowers on the ends, with a nice big sun for some sunshine.
It's called Reading in my Garden because those stacked strip blocks really do look like books, don't they? The quilt measures about 57" by 53" and I think it will go in my daughter's room.
Hooray for longtime projects getting finished up! Stay tuned for another finish or two. I was productive!
Labels:
2013 finishes,
Finish A Long,
quilt,
quilting,
vmqg
Tuesday, September 10, 2013
Non-Quilty Sewing Part 2
Part 1 got a bit long, so in Part 2 of my Non-Quilty Sewing report, I want to share the tote bag I made for the VMQG tote bag swap that's happening at the September 16th meeting:
I used up the last of the paint dropcloth I purchased at Home Depot a while ago for the exterior of the tote and the straps. The bottom panels and the pocket were from a thrifted curtain panel. I love upcycling!
Inside, I lined the tote with some cute sewing pattern fabric that had been "curing" in ye olde stash for at least 6 years because I know I purchased it before having G. Time flies!
I also installed a zipper in the lining, which I must admit I balk at every time and then it turns out to be not so giant of a deal. Why oh why do I do that to myself?
This tote is definitely on the larger side. It's 15" tall x 12" wide x 6" deep and the handles rise 15" from the bag (for ease of shoulder-slinging) - in the photo of the interior, it's got a folded lap-sized quilt in it and there's lots of room! I made it larger so that it could be used to tote quilts and larger projects to our VMQG meetings for show and tell! I hope the recipient loves it. I had fun designing it and stitching it up.
Sunday, September 8, 2013
Non-Quilty Sewing Part 1
Following my Vintage Star finish, I turned my mind to some non-quilty sewing.
First, I made a sweet dress for G to wear to the rehearsal dinner for my brother's wedding in July. I adapted the pattern included in Wendi Gratz's book Absolutely A-Line: 1 Easy Pattern = 26 Adorable Dresses for Girls, and made it out of a knit fabric.
Since the fabric (purchased on sale from a fabulous local fabric/notions/everything you can imagine store) was pointelle-style and a thus little see-through, I decided to simply double it up and make the dress reversible.
And since the dress was two full layers of fabric (admittedly ill-advised since the weather there was even more hot and humid than I feared it would be), I played a bit with the finishing of the hems. In addition to doing a lettuce edge (yay serger!), I cut a gentle curve up on one side of the dress so that the lining/flip side showed.
Buyoed with my success on that dress, I made the pattern up again using some vintage doubleknit that my mother-in-law gave me:
There wasn't enough fabric to make it reversible, so I just stitched down the neck and arm holes with my sewing machine's stretch stitch. Let's just say there's a reason I haven't including a closeup photo, mmmmkay? But that really doesn't matter. This dress received the highest honour a child can bestow: worn for the first day of school (over black and white polka dot footless tights and a pink t-shirt - I love this kid).
I have also cut out the pieces of a fleece coat for G but haven't been able to bring myself to actually sew it up. It's still warm here but I know my time is running out!
Thursday, August 8, 2013
Vintage Star
A coworker commissioned me to make a quilt to gift to her friend's daughter who's having a little girl in early September. I called it Vintage Star because the fabrics (some Moda, some other random stuff from my stash) seemed old-fashioned in the nicest of ways.
The quilt top came together really quickly - it's a nice, big star. I used a ruler I received in my QuiltCon swag bag to make the flying geese that form the quilt's points - I like when rulers take the complicated math out of things!
I had planned to keep the quilting pretty simple but that just didn't seem to be what this quilt wanted. I started with the centre feathered wreath (my first!) and went from there.

Plume feathers, more feathers and a fleur de lis in the corners:
I like some of the FMQ better than other parts but overall, I'm really pleased with this finish - I hope my customer is too!
Happily counting this toward my Q3 Finish-Along goal! Yay!
Friday, June 28, 2013
Friday Felicities
Hello, friends! It's Friday and you know what that means - Friday Felicities!
My Felicity today is a big one. I achieved a big personal quilt-related goal this past week:
I finally (FINALLY!!) found the time and motivation to publish my Easy Going Modern pattern! It's available for purchase on Craftsy for $5 (USD). The instructions for the quilt top and back for three sizes of quilt are included.
The motivation for me to finally get this pattern done was making it one of my Q2 goals in the 2013 Finish-A-Long hosted by Leanne She Can Quilt. There is time to prepare your UFO/WIP list for Q3 so if you'd like to get in on the fun, just click on the button here and have a look at the details.
This weekend is a long one here in Canada as we celebrate Canada Day and I think Vancouver may luck out in the weather department. I hope you to too!
Tuesday, June 25, 2013
Sweet Dreams: a Baby Quilt
One of G's directresses (they're not called teachers in Montessori) is expecting her first baby, due in September. About a week before the end of school, Kevin reminded me that a quilt for Ms Cindy should be on The List. It's a good thing he did - I had her due date of September in mind, completely forgetting that - duh - we likely wouldn't be seeing her once school was done.
So the race was on. I had cut a bunch of my 30s reproduction scraps into 5" charms using Krista's Go!Baby cutter (fun!) so this project was super fast to put together. I really like 30s repro fabrics for baby quilts - they're really sweet and I think they read as gender neutral much of the time.
It's smallish - 45" square - so it will be useful for playing on, or for tucking into a stroller.
For the quilting, I simply FMQd big loopy loops, one in each square - I really wanted this quilt to stay soft and cuddly.
The back is an upcycled/thrifted Ikea crib duvet cover that wasn't quite wide enough so I added a strip of patchwork, and I quite like the effect! The binding is all done by machine. First time for me attaching it to the back and then flipping it to the front and stitching it down using a presser foot with a centre seam guide (ditch sewing?). It was a great way of doing it - I may invest in an even-feed version of that in-the-ditch foot.
This is NOT one of my 2013 FAL goal projects, but it was fast and fun to do. I found out after we had gifted it to her that Ms Cindy had been hoping I would make her a quilt. Now I'm *extra* glad Kevin reminded me!
So the race was on. I had cut a bunch of my 30s reproduction scraps into 5" charms using Krista's Go!Baby cutter (fun!) so this project was super fast to put together. I really like 30s repro fabrics for baby quilts - they're really sweet and I think they read as gender neutral much of the time.
Surrounded in dappled sunlight in the courtyard
It's smallish - 45" square - so it will be useful for playing on, or for tucking into a stroller.
Aren't those doggies adorable?
For the quilting, I simply FMQd big loopy loops, one in each square - I really wanted this quilt to stay soft and cuddly.
The back is an upcycled/thrifted Ikea crib duvet cover that wasn't quite wide enough so I added a strip of patchwork, and I quite like the effect! The binding is all done by machine. First time for me attaching it to the back and then flipping it to the front and stitching it down using a presser foot with a centre seam guide (ditch sewing?). It was a great way of doing it - I may invest in an even-feed version of that in-the-ditch foot.
This is NOT one of my 2013 FAL goal projects, but it was fast and fun to do. I found out after we had gifted it to her that Ms Cindy had been hoping I would make her a quilt. Now I'm *extra* glad Kevin reminded me!
Sunday, June 23, 2013
Mug Rugs for Colleagues
Recently, I officially joined a new team in my company. I'd been seconded to work with the Training & Development department while my own area of the business was undergoing a redesign of our processes, and needed a trainer to train staff on the changes. When an opportunity arose for me to make my assignment permanent, I went for it and got the job!
To celebrate, and to thank my coworkers for being so welcoming and wonderful, I made them each a mug rug customized to their interests (e.g. Vancouver Whitecaps FC soccer, sailing), personalities (e.g. classic, sunshiney), tastes (e.g. purple, bling) or a particular fact about them (e.g. recent transplant to Canada from UK, meaning of their name). Here is a collage of the 10 (yes, 10) mugrugs I made.
They were *very* well received, I'm happy and proud to say.
There are individual photos of each mug rug in my Flickr photostream. They're all my own design, and I sourced the foundation paper piecing patterns for the Maple Leaf here, the Union Jack here, and the sailboat here (I adjusted one sail slightly so they weren't the same size).
Zakka Along 2.0: Weeks 2 and 3 Dish Towels and Tea Cozy
Thank goodness teachers needed gifts because I was able to kill two birds with one stone - Zakka Along projects AND teacher gifts!
First up, it's the Week 2 project, dish towels. The book gives directions and adorable appliqués for three towels. Owing to time constraints and lack of interest in a lot of appliqué, I only made two towels, and rather than the words Breakfast, Lunch and Dinner, I stuck to the rather bossy "Eat" for both towels and also added the salt and pepper shaker appliqués. I hope Ms. Cindy likes them!
As you may be able to see, I used a thinner linen for the towels because I'm really trying to sew from my stash and that's all I had. I think they'll wash up and soften quite nicely.
For Ms. Chris, I made the Week 3 project (and linked up in time to be eligible for prizes - yay!) Lettered Tea Cozy:
I didn't use the foundation paper piecing templates from the book (feeling lazy), so I basically free-pieced the letters. That strategy wasn't as successful when it came to the teacup so I just left it out of the final project.
Notice a 30s reproduction theme going on here? I happened to be making a baby quilt for the afore-mentioned Ms. Cindy using 30s reproduction fabrics (to be blogged soon), so they were around my sewing space when I needed scraps for these two projects.
I like these little sailor dudes!
See the other Zakka Along 2.0 Patchwork, Please! projects in the sew-along's Flickr group!
Subscribe to:
Posts (Atom)