Monday, November 28, 2011

Preschool Quilts! Are! Finished!

Dunzo! Finis! Hooray!

I could not be more happy with how these quilties turned out, not to mention the fact that they're done two and a half weeks ahead of time.

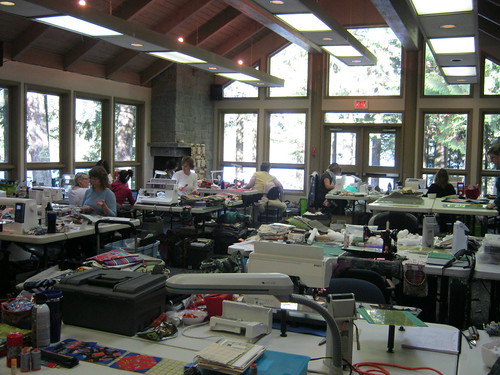
These are for a live-auction fundraiser for my little girl's preschool. There is a Kindergarten group, and a morning and afternoon preschool class. Usually each one has its own item to auction off. So Mother of the Year here volunteered to make a quilt for each group, with the kids' participation.

While I loved what Angela did here, I figured that might be a wee bit too advanced for 3 to 5 year olds, and settled on having them write their names on a leaf to add to their class's quilt. I helped the littler ones if they needed it, either by writing their name for them altogether, or by adding their name where what they'd written was a bit tough to decipher.

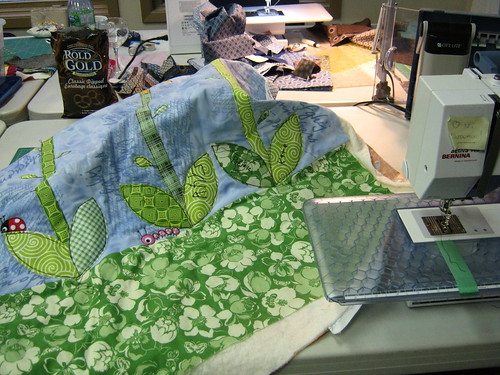
Everything was adhered using Heat n Bond light, which, when you use as much of the stuff as I did, really gums up the machine needle and causes the bobbin thread a fair bit of consternation. But I persevered, and I love how they turned out.

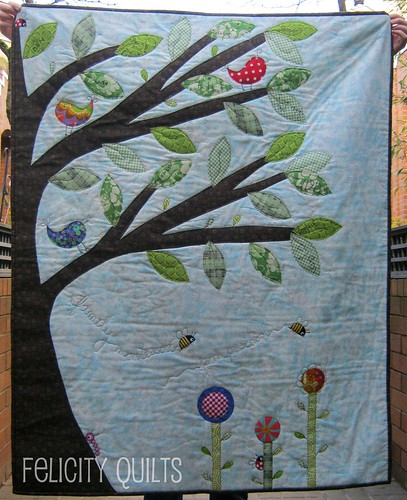
Kindergarten quilt - a garden for the kindergartens! 42" x 49" - a large wall-hanging or a small coverlet.

Kindergarten quilt

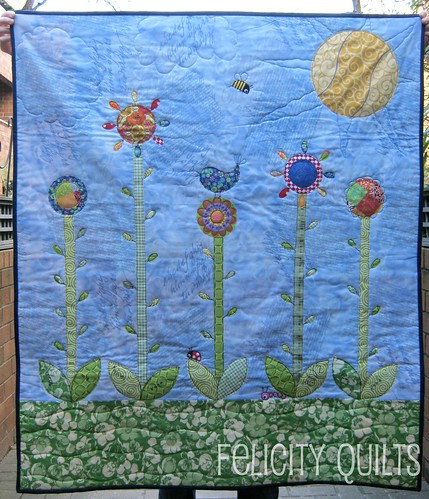
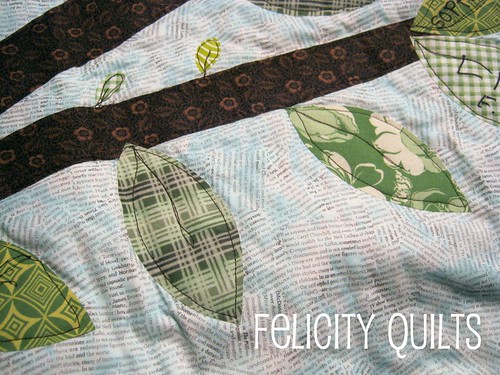
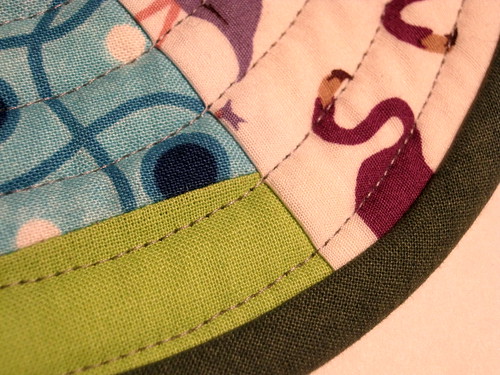
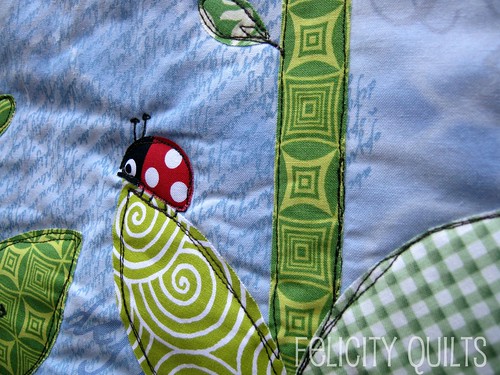
Detail shot of the cuteness (all the bugs were fussy-cut from a scrap without a selvage so I have no clue who made it).

Kindergarten quilt detail 2

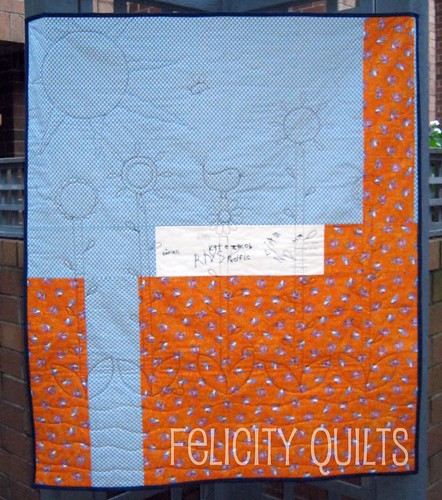
Here's what the back looks like:

kindergarten quilt back

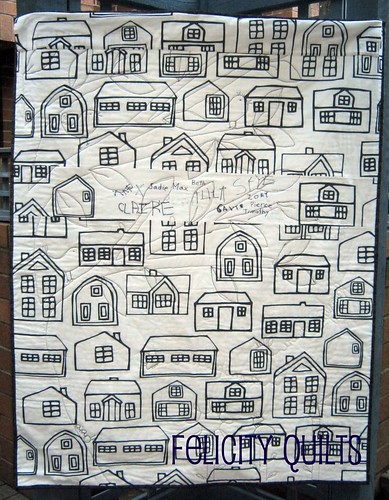
Morning Class quilt, which finished at 42"x54":
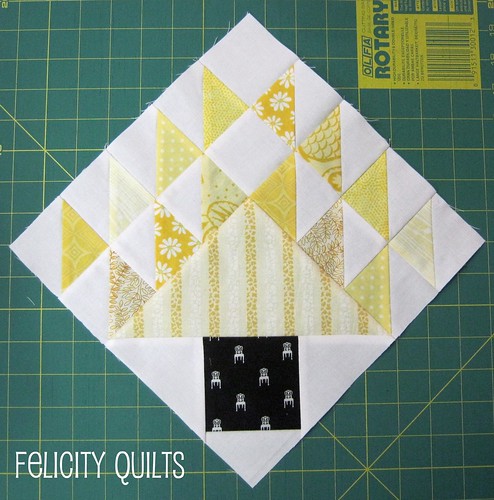
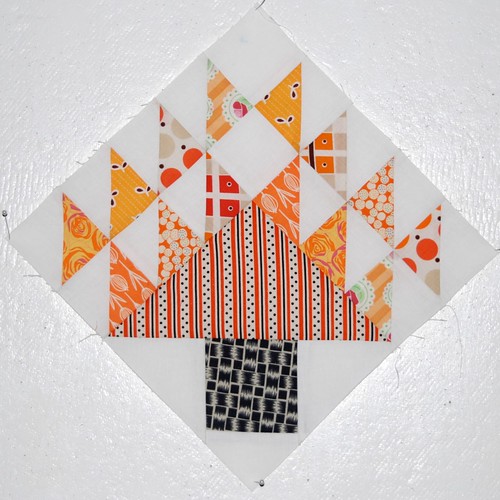
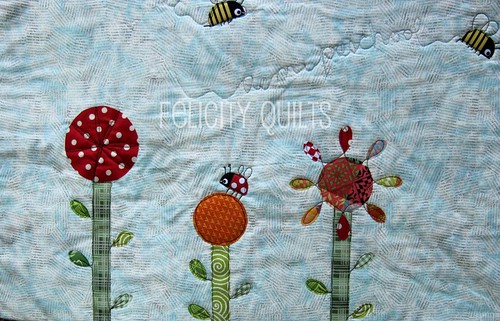
am preschool

Detail shots:

am preschool quilt detail 4
am preschool quilt detail 3

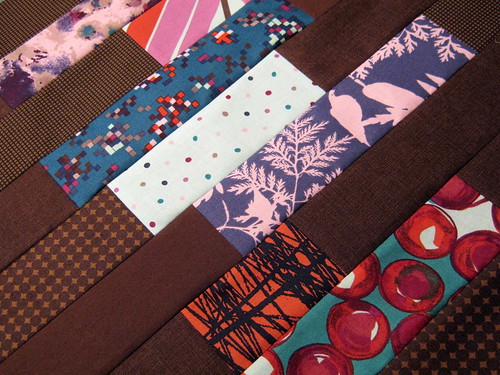
Back (fabulous IKEA fabric!):

a.m. preschool quilt back

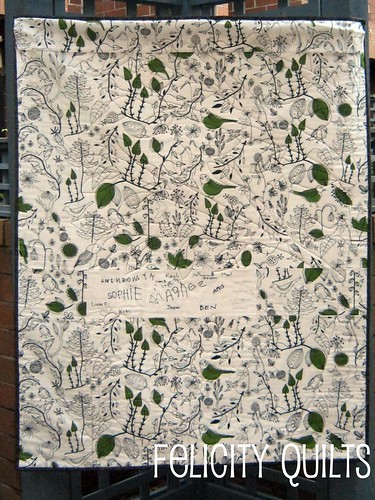
Afternoon Class quilt, which finished at 42"x53":
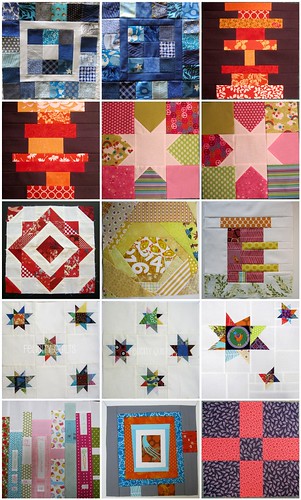
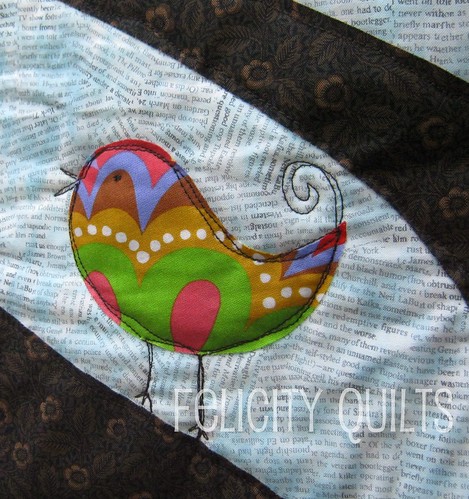
pm preschool quilt

Some more details:

preschool quilt detail 2
preschool quilt detail 1

Back (more fabulous IKEA fabric):

p.m. preschool quilt back

Clever readers may have noticed that the two AM/PM preschool quilts are a diptych - here they are side by side.

am preschoolpm preschool quilt

Waaay more photos (yes, there are, in fact, more) may be found in my Flickr photostream, and I am linking up all over the darn place with these lovely finishes, including Finish It Up Friday at crazy mom quilts and these other places:

{Sew} Modern Monday at Canoe Ridge Creations


Sew Happy Geek

Fresh Poppy Design


Fresh Sewing Day


Friday, November 25, 2011

Friday Felicities #16

Today, what's making me happy is....knowing when to give up.

I have a WIP/UFO that has been haunting me. In 2007, I took a class with Judy Niemeyer. Her foundation paper-pieced quilts are absolutely incredible, and I wanted to learn how to make one. My guild hosted a weekend workshop and I signed up.

We had a choice of three patterns and this is the one I chose (the "easiest"!):


There was a boatload of precutting so that we could spend our time in the workshop learning Judy's piecing technique - one I use to this day, so that's good.

Here's what I accomplished in a full 2-day workshop.


Yeah. One complete block (top left), three outside units and two inside units. (Whilst rummaging through the box that houses this project, I also found an additional 4 outside units in progress, with 4 pieces left to add on each one, which makes me feel a little less terrible about my productivity.) Aaaaaaand that's it! Now in my feeble defense, within 6 or so weeks of the class, I did give birth to my little girl. But I truly have not touched this project since.

And do you know what? I'm not going to! Well, to be specific, I'm not going to finish making this whole quilt. I will commit to finishing the four blocks shown above as a housewarming wallhanging/table topper for my lovely Dad. But the rest? I'm letting go. 

The colours aren't really "me" anymore. I went with what was in my stash, hence the switch between the dark background/light flowers and no batiks, and I won't LOVE the finished product.

Thank goodness I was too lazy to cut all of the pieces for all of the blocks, so I can salvage the fabric scraps for future projects, or to give to someone whose palette they suit better than mine. In any case, I don't feel one bit bad about letting this project go - I learned valuable skills in the workshop, had fun with my guild buddies, and spent an entire weekend quilting. I'd say that's a success, wouldn't you?

Have a great weekend! I hope to have some finishes to share this coming week so stay tuned.

Friday, November 18, 2011

Friday Felicities #15

This FF post is the Late Edition! But no less full of happy.

What has made me happy today is that we have a "sister" Modern Quilt Guild - the Fraser Valley Modern Quilt Guild. "Greater Vancouver" covers a pretty significant area, and people who live in the suburbs to the east of Vancouver found it really challenging to make it to the VMQG meetings. So they started their own Modern Guild!

We are winding up our very first inter-guild activity: a potholder swap. VMQG members received the name of a FVMQG member (and vice versa). We had a very short questionnaire to complete to give our partner some ideas of our tastes and preferences. Our potholders need to be in the mail by the 30th of November.

Mine have been done for a while (what is with me these days, finishing stuff before deadlines??) and I was waiting to show them off at the VMQG meeting last night. Now I can mail them to my lovely partner.


A bit of process for those who are interested....I knew I wanted to do a wheel with wonky/uneven segments. I traced a mixing bowl, and then drew randomly-sized pie pieces. Using that as a foundation, I used my scraps sewed down each segment in turn. I pieced a couple of the segments using some strips to amp up the Scrappy. I got a little flummoxed at the last segment, but managed to figure it out/fudge it. I realized after piecing BOTH potholders that I should have made two half-circles and sewed them together. Next time!

The centre circle, I made using this fabulous tutorial by Krista - Poppyprint. After fusing it on, I zigzagged around the outside to secure it.

I consulted a few different online tutorials and ended up choosing to line the potholders with one layer each of: Insul-Brite, canvas and Warm and Natural 100% cotton batting. Backing and binding (bias, of course, for these circles!) are from a thrifted IKEA duvet cover. Quilting was in grey, in a spiral pattern, simply using the outside of my walking foot to keep the lines more or less even.

I'm really, really pleased with how they turned out, and I hope my partner is too.

Potholder Swap

Have a great weekend!

Edited: I'm linking up to Sew Modern Monday and Manic Mondays at SewHappyGeek (see right sidebar for buttons).

Wednesday, November 16, 2011

WIP Wednesday/Retreat Report

Warning! Long post ahead!

I'm back home and, having gone to sleep at about 8pm last night, I am nearly caught up on the sleep I *didn't* get on the weekend.

Friends, it was absolutely fabulous. From 3pm Friday until 2pm Monday, all I had to think about was quilting. No meals to make, no cellphone reception, nothing but eating, chatting and quilting. Lots and lots of quilting. Also, chatting. And laughing.

Krista did a wonderful job of planning - the location was wonderful (snow on Saturday that we watched fall as we sat cosily sewing away in the great hall) and the food was delicious. Here's what the work room looked like - LOTS of activity, eh? Those windows let in so much lovely natural light, and the view was marvelous - when I raised my head from my work, I could see the trees and Loon Lake. Gorgeous!

retreat work room

Here's my work area, with one of the preschool quilts in progress (and a bag of delicious chocolate-covered pretzels in the background):

quilting in progress

Speaking of the preschool quilts, here's my "what I planned/hoped to do vs. what I actually got done" list and it's not half bad if I do say so myself!

Preschool quilts. I wanted to get all 3 basted and quilted. GOAL EXCEEDED! Not only are all three quilts quilted, but I cut the bindings for all 3 and two of them are sewn on. Here's a peek of the quilting on one of the tree quilts. VERY happy with how these have turned out.

preschool quilts quilting

Stash Trad block. Goal met - the block is dunzo:

Pine Tree block for Krista Poppyprint

Habitat Challenge. Wanted to get all 4 pillow covers made. HAHAHA. Annnywayyyyyy, I got one more pieced, and the fourth cut out/planned. Not bad. This happened late in the retreat and I forgot to photograph my progress. Below is a photo I took just now - didn't even press the darn thing for you. This is likely not going to be done in time for the VMQG meeting on Thursday. Ah well. I'll bring what I've got.

habitat progress

Commission Quilt. Wanted to get the top done at least, and only managed to get the tree cut out and fused. Not too shabby.

Mom's placemats. Didn't get worked on at all. But with all the progress I made on the quilts, I will have these done for Christmas no problem.

And finally, I used up more of my luck by winning one of the door prizes - a copy of Modern Blocks, which I got signed by one of the designers, Krista of Spotted Stones. I've got it sitting on the back of one of the quilts, with the World's Most Perfect Backing Fabric (from IKEA).

using up my luck

Krista and another Flickr friend, also named Krista (!!) came from far away to spend the weekend, making it all the more enjoyable. I also want to shout out to my work space partner and roommate Sindy, who introduced me to the wonderfulness that is chocolate-covered pretzels. Dang those are yummy.

Linking up with Lee and Monika again!

WIP Wednesday at Freshly Pieced

Friday, November 11, 2011

Friday Felicities #14

It occurred to me this week that while I didn't start this blog for external validation, that certainly is a pleasant byproduct. More than pleasant, actually - the feedback I get from comments is another way I connect with likeminded quilters and crafters and it's really lovely. So if you follow, read and/or comment - thank you! You really are a felicity in my life!

My Friday Felicities post today is a comment-related PSA for bloggers using the Blogger platform.

Have you been getting fewer comments lately, or more Anonymous comments where the commenter said they couldn't use their Google profile to leave a comment, or emails from readers telling you they can't comment? If the answer is yes and you're wondering how to fix that, read on!

Are your Blogger settings for Comments are set to have comments embedded at the bottom of your posts like so:

comment_capture

Then readers who upgraded to Internet Explorer 7 or beyond can't comment using their Google IDs. They get in an endless loop of being asked to login, and the login doesn't seem to want to "take".  I don't know why; the Google wasn't much help on it.

There's a simple workaround, however. Tell your readers to use Chrome or Firefox! Just kidding. You're going to need to switch from a comment form embedded at the bottom of your post to one that is in a popup window or its own separate page:

1. Go to your Blogger dashboard.
2. Click on Settings.
3. Click on Comments.
4. In the section called Comment Form Placement, select one of the other two options for comment format: full page, or a pop-up box. Either one works. Note that if you are using the new Blogger interface for managing your account, the comment form placement options aren't available (or if they are available, I was unsuccessful at determining where to find them).

Here's a screencap of my dashboard with some illustrative colour highlights.

comment_form_screencap


I figured some (most? all?) bloggers out there love comments as much as I do, and want to remove any barriers there may be to getting those comments. Hope this little PSA/tutorial helped!

Have a great weekend!

EDITED (January 30, 2012). This issue has since been fixed, it seems. But this tutorial can still help you figure out how to change the look of  your comment box...

Wednesday, November 9, 2011

WIP Wednesday

I feel like this place has been a bit boring lately - I have actually not been doing all that much sewing lately. Not sure why - kid was a little sick, and there was Hallowe'en and what not. But I am going on retreat allll this coming long weekend PLUS Monday so that is definitely happy-making for me!

For now, though, here we go (with some notes since this is doubling as a Retreat To Do List):

AM/PM/Kindergarten Preschool Quilts: Tops all finished, waiting to be basted and quilted on retreat. Retreat project.

VMQG/FVMQG Potholder Swap: Project status is complete but I don't want to show them until the package has been sent to my secret partner, so here's a tiny sneak peek. I know, right? BORING! (Is that why I lost a follower, I wonder? [sad face])
potholder closeup

Habitat Challenge Project: In progress. Another retreat project. Here's where I am at with it.

habitat more progress

habitat progress

Did you notice that I am a rebel? I broke the no fabric besides solids rule with some near-solids. Spoiler alert: these are going to be cushion covers for my sister and brother-in-law so I took some liberties with the fabric constraints. I've got two other cushion covers to make and I'll be using a different design - a new favourite I found in blogland:


Stash Trad Bee: I've pulled the fabrics to make a yellow version of this block. If I don't get it done in the next couple of nights, it'll be another retreat project. Nice that I can give it to Krista in person!

Pine tree block for Pops
(Edited to clarify that the one above was not made by me, but by Lynne of Lily's Quilts).

Commission Quilt: A family tree quilt in the same style as the preschool tree quilts. In progress, another retreat project.

Mom's Placemats: Also hoping to finish these on retreat.

I implore you to go visit Lee and Monika for some far more exciting WIP Wednesday updates!

WIP Wednesday at Freshly Pieced

Friday, November 4, 2011

Friday Felicities #13

Today's Friday Felicities post goes out to my fellow Quilt Bee participants from the past year. I was in three bees throughout the last year, and each one was different.

Sew & Bee Happy was a 12 month sew-from-your-stash bee. The queen bee for the month specified the style of block she wanted, as well as what colours to use. We then sewed 'em up and sent 'em off.

Sew Buzzy was also a 12-month bee, but I joined when they lost a member a few months after the start. In this bee, we sent our fellow bees the fabric to make the blocks for our month.

The Maple Leaf Bee 2 had a similar format to Sew Buzzy, but there were only 6 members and we each made 2 blocks per month.

With the three bees behind me, I have concluded the following: three bees are too many; I prefer bees where I sew my stash - less postage costs! Here's a mosaic of the bee blocks I made in the latter half of my Bee year:

Bees!

So I am down to just one for the upcoming year - Stash Trad. We sew traditional blocks from our stash in the colourway requested by that month's queen. October was the first month, and I made the Cracker Scraps block for Angela

Cracker Scraps for Angela

November's block looks very interesting - lots of HSTs in a beautiful Pine Tree block for Krista

 I will say that the experience of being in a bee can be really great - learning new skills, sewing with other people's fabric, making blocks you wouldn't normally have ever tried. If you've got any questions about online quilt bees, drop me a line or ask it in the comments and I'll answer as best I can.

Have a great weekend!

Wednesday, November 2, 2011

Bloggers' Quilt Festival: In a (Solid) Pickle

Hello and welcome if you're visiting for the first time from Amy's wonderful Bloggers' Quilt Festival! Feel free to say a while and have a look around.

I'm not blogging a new quilt for BQF this time, unfortunately. But I am blogging a favourite.

In a (Solid) Pickle

I made this mini quilt for the For the Love of Solids Modern Swap on Flickr. There's a longer process post here if you'd like lots of detail. But the short of it is that the block is a Pickle Dish, hence the quilt's name. I found the inspiration in a Kaffe Fasset book - Quilt Romance. The inspiration quilt was done in patterned fabric, but as soon as I saw the block I knew that's what I wanted to make for my partner.

The quilting was a challenge to figure out - I was leaning toward free-motion somethingorother, but my quilty friends helped and I went in a totally different direction. What a great decision! I love how the quilting makes the block look spiky and adds a New York Beauty-esque layer to the overall look.

In a (Solid) Pickle quilting detail


I hope you enjoyed my quilt and please be sure to visit the other fantabulous creations that are being shared in the Festival (500 as I write this post!).

Amy'sCreativeSide