
It's super easy and I'm happy to tell you how I did mine.
1. Trim your quilt.
2. Cut a strip of flange fabric 3/4" wide. I prefer to cut the strip parallel to the selvage because the fabric doesn't stretch or distort as much. You can measure the height and width, or just eyeball it like I did and cut a piece for each of side of the quilt's 4 sides. Err on the side of caution and cut them longer than you need. Ask me how I know *that* bit of advice.
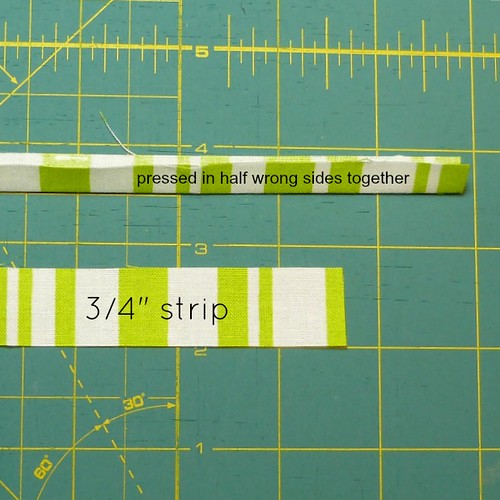
Press the flange pieces in half. Try not to distort them too much. If they curve a bit, just move them back into shape when they're still warm from the iron.
3. Take a pressed flange piece, and line it up, raw edges together, with the edge of your quilt. Make sure it covers the length of the side you're attaching it to, extending a bit past each end. Stitch it on with a 1/8" seam allowance, which means the seam will be hidden when you attach the binding with the usual 1/4" seam allowance. Try to keep the flange lined up as exactly as possible, and keep your seam allowance even. Every little blip really shows up because you're dealing with small bits of fabric.
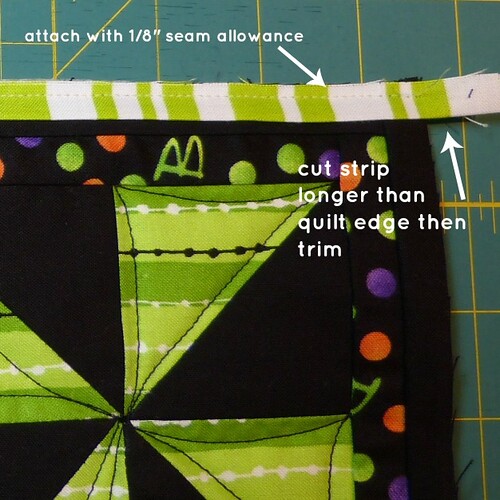
4. Go ahead and attach all 4 flanges, and it's okay if they overlap at the ends. Then trim the ends flush with each side.


5. Attach your binding as usual and enjoy your neat little piping/flange effect!

Thanks for the tut, Felicity. I'm excited to try this on some upcoming projects...after Christmas sewing is done, of course!
ReplyDeleteThank you for this - off to add one to a cushion I am making!
ReplyDelete